

Introduction
(Update 1: November 2017)
Remember to join our Facebook group Mesembs for Africa for news on surplus material.
In our previous blog post we discussed Sources of Lithops seeds. You can also have a look at what seeds I have to offer here. If you are lucky, you have received your seeds in little wax, glassine or paper envelopes. This makes sowing easier. Some suppliers use plastic Ziplock bag that is bit more difficult to use since the seed tend to stick to the plastic. There is also some concerns from some growers that storing seeds in non-breathable envelopes for prolonged periods may affect germination rates. If you have been given whole capsules, you will obviously have to extract them first so read on, otherwise you can skip the following section and jump to the section after that.
Extracting seed from capsules
I have learned that there are probably three ways of extracting seeds from dry capsules. Lithops seed capsules, like other Mesemb capsules are hydrochastic – simply meaning that they only open when they become wet. This is a protective seed saving mechanism that only allow seeds to be exposed and wash out during rainy weather. When the capsule becomes dry again, it closes again and locks up the remaining seed until the next rains. It is fascinating to see this for the first time.
Beginners tends to latch onto this peculiarity to extract the seed – wet the capsule and when it opens, pick out the seed onto coffee filter paper with a toothpick and allow to dry. While I will admit that this does have some therapeutic effect, it remains a terribly slow process to process large quantities of seed.
A slightly faster approach is to crush the capsule on a sheet of paper with a solid object, and discard any husks. Make sure all the seeds have been removed from the husk. Pick out the remaining ones with a toothpick. Try and removed as much of the husk debris as possible as this may decay under fungal attack that can spread to the seeds.
Once you get into serious sowing, you will need a faster approach. I have adapted this from a trick Flip Bornman taught me. Soak the seeds for a couple of hours in water to soften them. They will also open up and release seeds but this is not important for this technique – just make sure you recover any seeds that were released during this time.
When the capsules have soaked for a couple of hours minutes and the husk are soft, throw them in a 20cm deep container and chop them up with a stick blender. Don’t worry – you will not damage the seeds. The seeds (at least the viable ones) quickly drop to bottom and the debris floating can be decanted and discarded. If there is fine debris that are difficult to decant, everything can be poured through a kitchen sieve, collecting the seeds at the bottom. Make sure all seed have washed trough. Decant excess water from the seeds. Place a napkin or smooth kitchen towel over a glass, poke a dent into it and decant the seed-water mixture onto it and leave it to dry. Once dry, the seeds can be carefully scraped up and stored.
Another way to extract the seed from the water is to swirl the container – it works like a centrifuge and viable seeds collect in the center. While the water still swirling, suck up the seeds with a plastic pipet or eye dropper (South African reader – think Westpack). Lightly tap pipet to concentrate seeds and expel onto a piece of paper , labelled with appropriate data. Leave to dry for a couple of hours.
Considerations about seed age.
Seeds that are not going to be used immediately are, according to my current understanding, best stored in the whole capsules at room temperature. Seeds remain viable for up to 10 years if stored this way. Some growers claims degradation and reduction in viability once seeds are older than 7 years. I have had very good results with seeds that were stored for up to 13 years in their capsules. It is probably species specific as well.
However, seeds that are fresher (less than 2-5 month old) often germinate erratically or slowly compared to older seeds that were sown at the same time. I have had seeds that remained dormant for 3 months before they suddenly started to germinate. I am not sure if this is same mechanism that often makes mature seeds germinate in batches.
In some experiments known quantities of fresh seeds were sown. After about two weeks 10% of seed had germinated. The remaining seeds and substrate were dried out for two weeks and moistened again. 40% of the seed then germinated relatively quickly.
Based on this, if you obtain seed try to establish when it was harvested and wait 5 to to 6 months after harvest before sowing. This does take some patience though. Pots that have not shown reasonable germination can be dried out and “restarted” after a couple of months with very good results. I suspect seeds need a certain level of dryness before they will germinate. In an experiment I stored some fresh seeds (2-3 months after harvest) with silica gel for week and placed 20 of these seeds on wet cotton in a petri dish as well as 20 untreated seeds as control. After about two weeks 3 out of the 20 in the control dish germinated and 7 in the dish with treated seeds.
When to sow Lithops
I have had good results sowing Lithops at various times of the year. Best germination temperatures appear to be around 20 – 28 ⁰C. I have successfully germinated Lithops inside during South-African Winter months and move them out to protective areas in August. Otherwise I prefer to sow in August and September to get a head start before the heat of summer sets in. Once temperatures start to drop again as autumn approaches, I will start sowing again, even up to April. This offers some time to establish seedlings and somewhat harden them off before temperatures drop too low here. That said, I have recently successfully germinated some 50 pots that were sown in January during a week-long spell of rainy weather. To aid comparison with your specific climate condition, you can find reference to my climate profile in the About page.
Best germination results tend to coincide with rainy weather and slightly cooler temperatures. Presumably the high humidity associated with rainy weather supports improved germination. In fact, it is not uncommon for seed to suddenly germinate en mass in established pots that have been sown months (and sometimes years) ago when atmospheric conditions change. I don’t think all the physiological factors controlling Mesemb seed germination are fully understood yet, at least not by my.
Preparing a suitable soil substrate
I have germinated Lithops in many soil types, including pure vermiculite (obvously with some added nutrients since vermiculite are inert on its own). Lithops will probably germinate in many types of substrates but while many will support good germination, they can become problematic in the long run. After several mistakes, I now have the following objectives when creating a substrate for germinating Lithops.
- Substrate must be easy to wet. To a large extent, for me, this rules out many commercial germination mixes. These mixes appear to be mixed from vermiculite, peat moss, sifted compost and maybe coco coir. The first time I used “germination mix” was when I sowed seeds on it and tried to wet it with a mist spray from a garden hose. Only the top 1-2cm became wet. Fortunately I realised it and then decided to soak the pots in water so that air can escape at the top while water enter at the bottom. Bad idea. All the substrate in the pots, with precious seeds, floated up with the rising water and eventually escaped the pots! Maybe I just don’t know how to work with germination mix. Update: I think I have figured it out now. I visisted a succesful grower in Johannesburg who exclusively uses Culterra Profressional germination mix. It is very fine mix and already moist in bag so it wets easily. I am trying that now to see if it works for me.
- Substrate must allow easy root penetration. Ideally the substrate mixture used for sowing should not contain particles sufficiently large to obstruct taproot development of the young seedlings. Imagine the struggle when a tiny Lithops seed get stranded on a rock or compost chip that is 1cm large. A relatively fine mixture allows unhindered root development.
- Substrate must offer good balance between drainage and moisture retention. Lithops seedlings appear to have a much larger tolerance for over-watering compared to adult plants. Although they are surprisingly tolerant of drought (read couple of days) at a very young age, one does not want to unnecessarily keep them dry for too long as it might stun their initial development. I have had successfully germinated seeds in a mixture of 5 parts plaster sand and 1 part sifted compost but it appeared to be to moisture retentive and I ran into some root rot problems 5 months after sowing.
At this stage I do not mix the ingredients strictly by volume but eye-ball it as I go along. I realise that new grower might prefer to narrow it down a bit more so I will venture into giving some proportions. The basic ingredients discussed here are easily accessible in the South-African market.
The mixture depicted here consist of:
- 5 parts swimming pool filter sand (I buy 40kg for R98 at local hardware shop)
- 3 parts fine sand (play sand, plaster sand, sand from the roadside are fine)
- 1 part sifted compost
- 1 part fine coir (coco fibre, sold as compressed peat block at local nurseries)
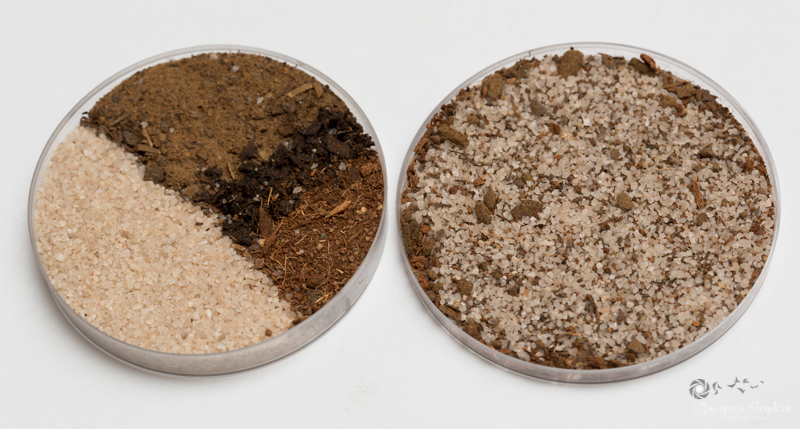
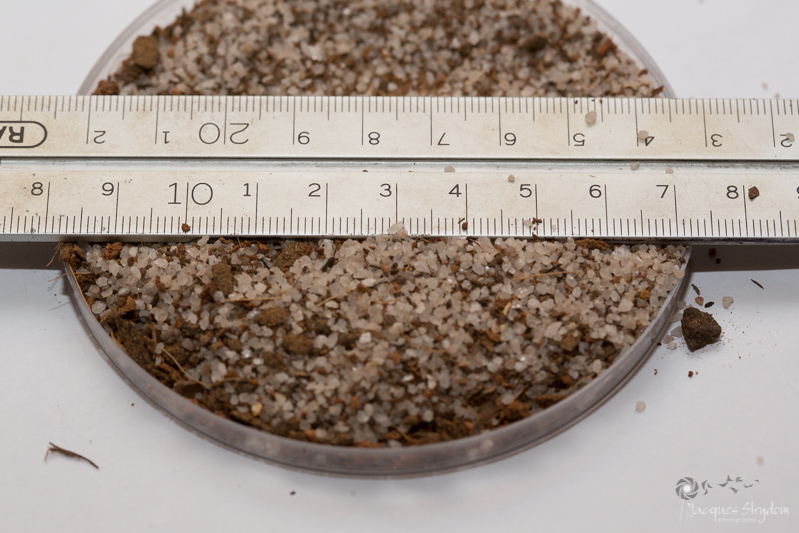
Wet the ingredients slightly when mixing to get equal distribution and to prevent the fine particles settling out to the bottom. I also belief that moist mixed particles give rise to a substrate that is different from the one obtained during dry mixing. I imagine the reason for this coco-fibre and similar moisture absorbing particles swells and act like little springs pushing apart other particles with the result that total air porosity is increased.
Selecting sowing containers
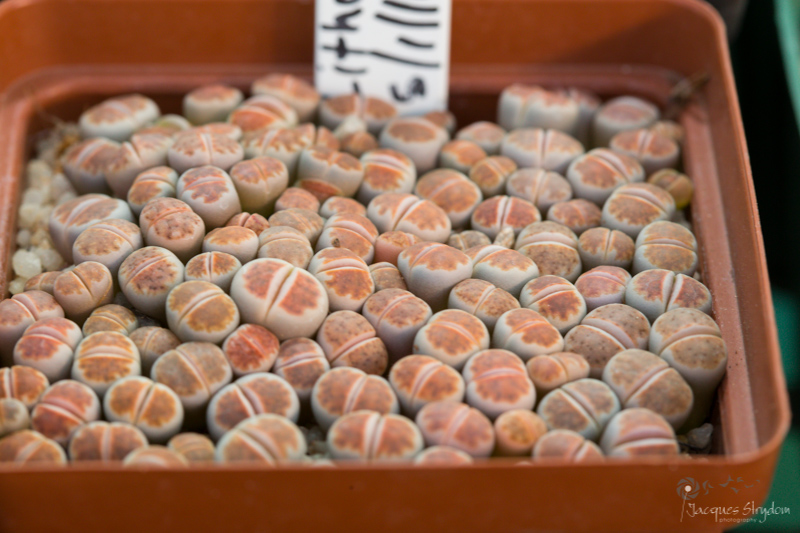
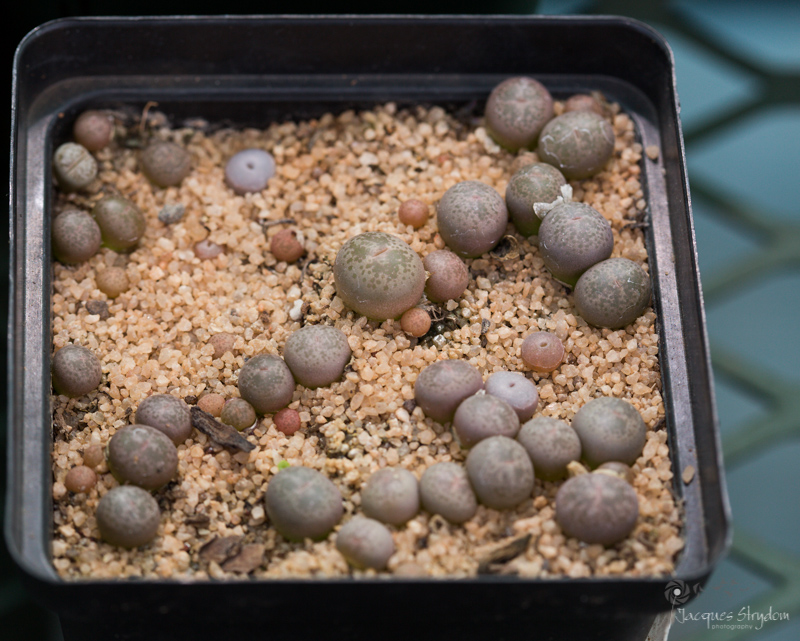
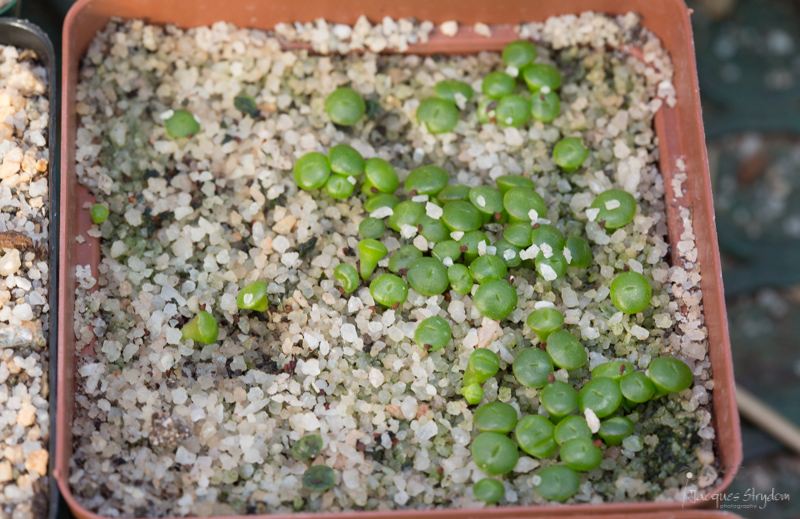
Any container that is at least 5cm deep will work, provided it has ample drainage holes. You will need to grow the Lithops for about one year in the container before transplanting. I prefer to use 10cm plastic pots for sowing. A single 10cm pot can easily accommodates 100 seedling for a year as depicted in Figure 3. When sowing capsules, consider spreading one capsule over two or three pots to prevent unnecessary crowding. This is especially true for species with high numbers of small seeds per capsules such as karasmontana, julii, halli, salicola and optica. The pot in Figure 3 is hosting one third of a karasmontana capsule sown 60 weeks before.
Preparing pots for sowing
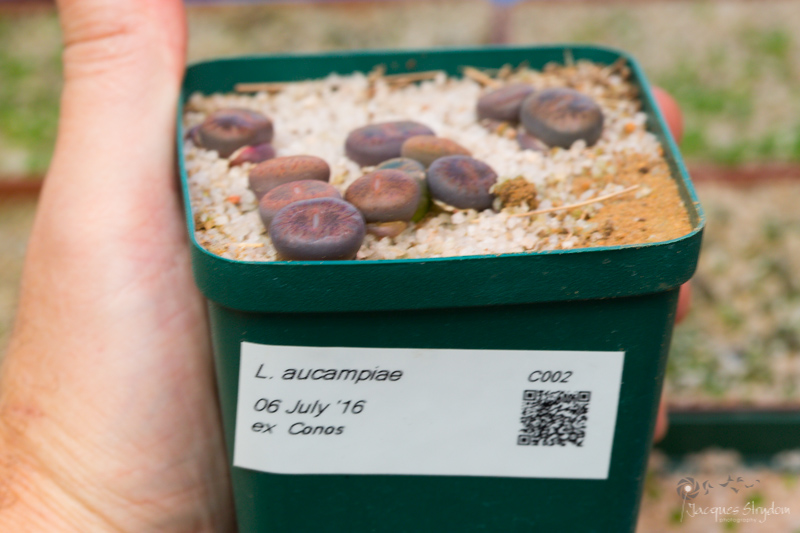
Before sowing a batch, clearly label the pots with all the relevant information. Trying to write on the pots when they are already filled with substrate can be awkward. Consider recording species name, date sown, origin of seed and maybe notes on the mixture. Many growers simply record a number on the pot and record the details elsewhere (e.g. in a book or on a computer). I prefer to have info on the pots as back-up and to be able to identify contents of pots immediately without cross reference. A soft (6B) pencil is very useful for marking the pots or labels and markings can be erased later if you opt to re-use the pots. It is also waterproof and resistant to bleaching from the sun. For bulk sowing of 12 pots or more I prefer printing labels electronically as my handwriting is totally illegible. I have record of all seed received in an Excel database which I can import into my automatic label printing program. To save space on the label, the substrate details, including fertiliser and fungicide rates are included in the QR code. I can conveniently read the QR code with my smartphone when required. Take note: Having professional looking labels is not a pre-requisite for successfully growing Lithops!
Next, add some coarse material to the bottom of the pots to prevent the substrate falling through. Keep in mind that a moist substrate will create a false sense of security as it will stay into the pot but as soon as it dry out, all of it with fall through the drainage holes. It is extremely frustrating to see a sinkhole develop in the middle of your Lithops seedlings when you pick up a dry pot!
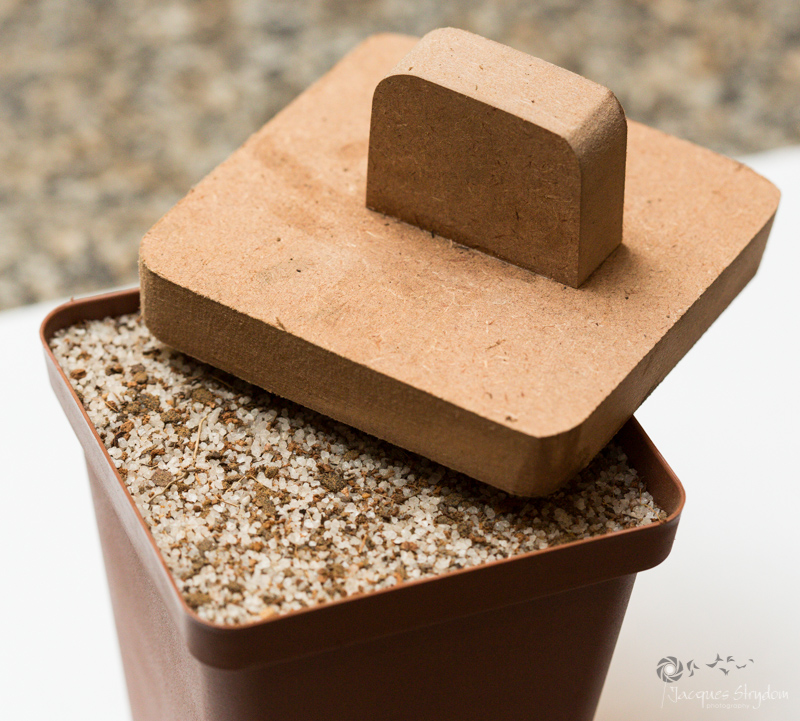
Lightly compress the soil mixture with something appropriate, even your fingers if you cannot find anything else. I have had someone made me up a little block with a handle to save my fingers when sowing 50 or 60 pots. I like to leave a gap of 5mm or so below the top. As we will discuss later, the pots need to be covered and this gap helps to initially keep some growing space between seedlings and cover, depending on what you use for covering.
Do not over compress the substrate as I belief it can hampers development. This belief is based on some trials I conducted. Figure 7 shows a 12.5 cm pot sown with Lithops subsp. karasmontana var. tischeri C182. The left side of the pot was compactly tightly and the right hand side of the pot was compacted less tightly. You are welcome to draw your own conclusion from this.

thops subsp. karasmontana subsp. karasmontana var. tischeri
Figure8 shows similar results in a pot of Lithops coleorum SH1500.
Sterilising Substrate (Optional)
I found that sterilising substrate in the microwave oven can markedly improve germination. Figure 9 shows two pots of Lithops gesinea that was treated the same except the pot on the right was sterilised for a couple of minutes a microwave oven. The pots were each sown with 80 seeds. After a couple of months there are 74 seedling in the pot with sterilised substrate and 47 odd in the other one. I think it is a worthwhile effort when sowing expensive or hard to come by seed. Some growers prefer to sterilise bulk substrate in microwave or oven before scooping into pots.

Sowing
If you have sterilised pots with substrate let it cool down before sowing. Evenly distribute the seed on the surface, using about 100 seeds per 100 square centimeters (10 x 10cm pot). You can again lightly compact the soil to make sure seeds make good contact with substrate. This helps them to effectively absorb moisture before germinating. Check that seeds do not stick to whatever you are using to compact the soil, especially if soil is moist.
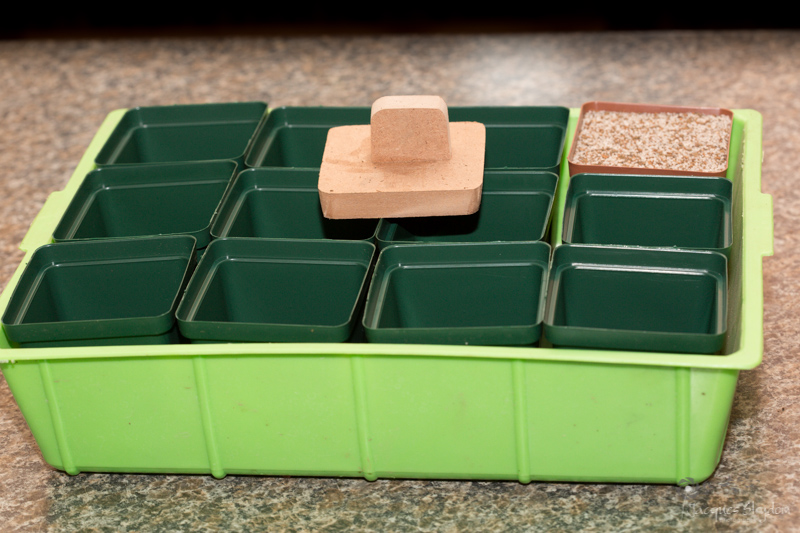
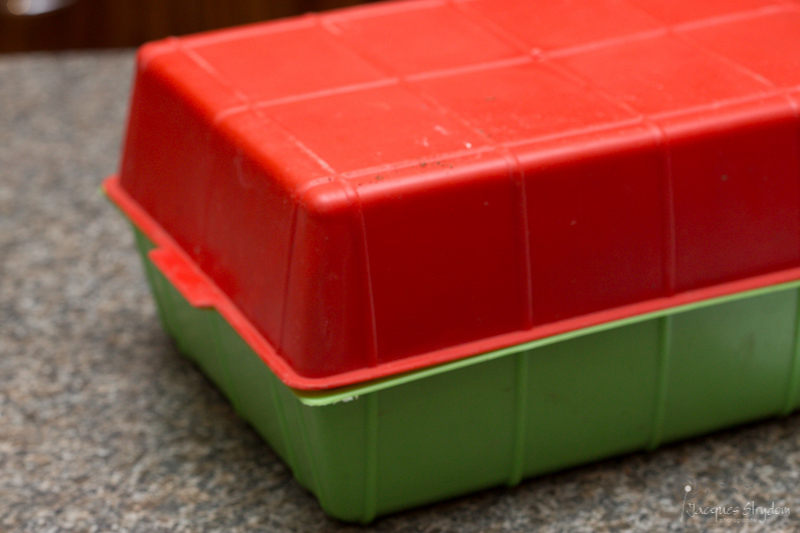
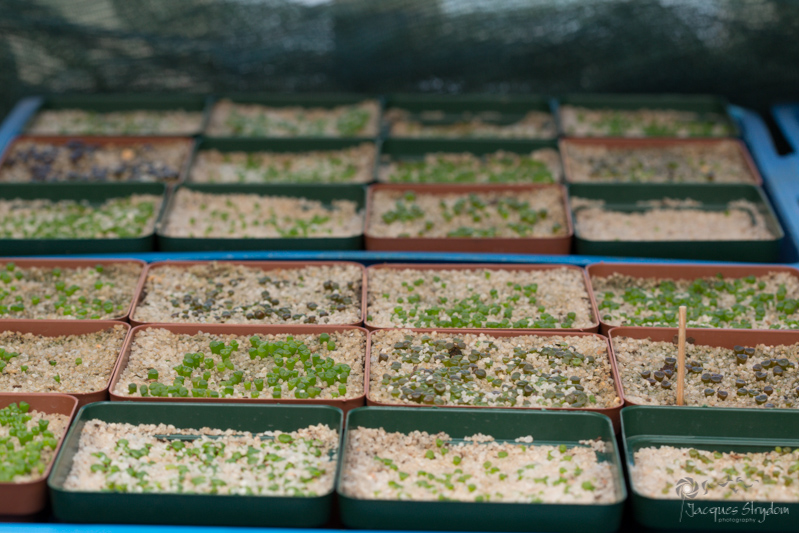
I sow batches of 12 pots at a time since 12 of the 10cm pots neatly fits into a cat litter tray. I have picked up a couple of cat litter trays for a mere R14 from large plastic product warehouses.
Before putting the pots in the tray, I add 3L water treated with 3mL Funginex (Triforine 190 g/l). The objective of the Funginex treatment is obtain some systemic protection against fungus. Since the substrate I use is relatively lean in organic matter, I also add some water soluble fertiliser at normal recommended dosage to the water. I normally use a mixture that is formulated for hydroponics but have also used Multifeed 2:1:2 with great success. If you will sleep better, use half strength, but in experiments I conducted I have used up to 5 times recommended dose without ill effects.
If you cannot find Funginex DO NOT replace with something else. Rather not use anything at all unless you could ascertain from the label that the active ingredient is Triforien. I have killed, or at least severely stunned about 50 pots of Lithops by using a product that contains Mancozeb as active ingredient. After about 1 year, most seedlings are about 2mm in diameter. Some are only now starting to escape the spell and fatten up. Benomyl also appear to be a suitable fungicide that will not inhibit germination.
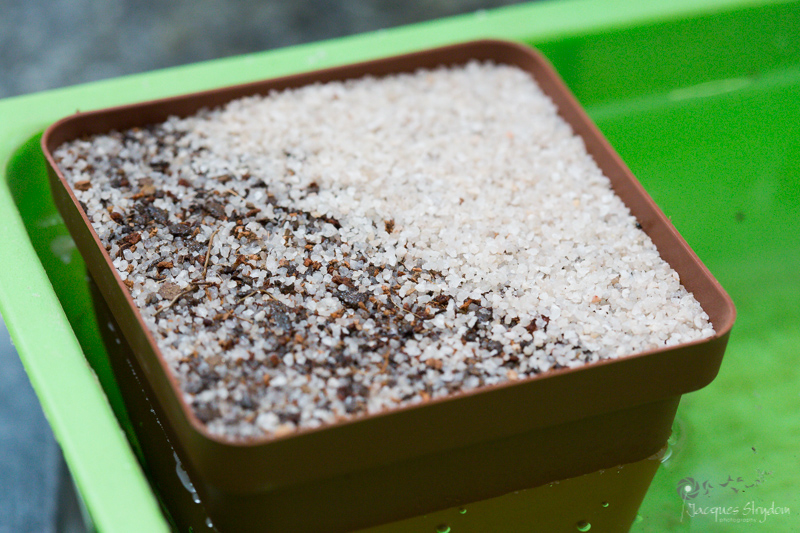
Now place the pots in the cat litter tray so that they soak up the water from the bottom. The 3L water in this size tray will ensure that initially the water level rise close to the top of the pots. After a couple of minutes you will notice the surface of each pot glistening indicating that the pots are saturated with water.
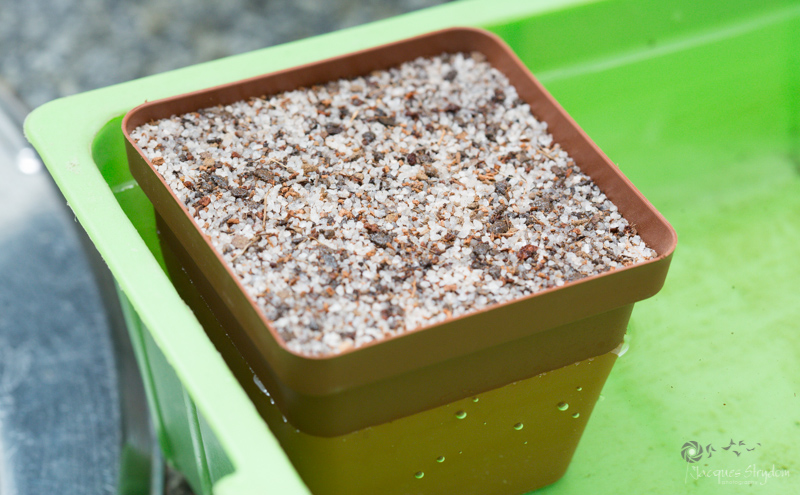
Now loosely cover the the seeds and surface with 1-2mm layer of filter sand as depicted on the top right of the pot shown in Figure 12. Aquarium sand or gravel are acceptable alternatives. (Consider using that rinsed sand that have been try – sometimes the fine dust bind the particles and prevent even water peneration a couple of weeks later). The gravel layer provides essential support for the seedlings as they germinate. This is probably the most important step in sowing Lithops (and other Mesembs except Dinteranthus that are so small that they probably do better with no top layer). If seedlings are not supported in this manner, they are likely to topple over and can get infected by pathogens through increased soil contact.
Excess water can be left in the tray while seeds are germinating. This helps to ensure that a humid environment are maintained which seems to be essential for successful germination. Just make sure the top of the substrate is not too wet. If it is , decrease water level. It depends on the wicking capability of your substrate mix. You can cover the seedlings with, glass, perspex, plastic or another cat litter tray.
Germination
Now move it to a place where it receives bright light but not direct sun. Direct sun on closed containers will cook the seeds! Many growers claim that Lithops require light to germinate but I have not seen proof of it and have germinated Lithops in the dark. It is of course important that they receive adequate light after germination otherwise they will become “leggy”. Some growers prefer to mist spray the pots twice a day. I am not sure if it makes a difference and I have had great success without doing it when using the wet tray method described here. However, I have also heard that fresh seeds have a germination-inhibiting coating and misting might help leach this off. I could not proof this since I tried to rinse such coating off with a mild detergent and water but germination did not improve.
Daily inspect pots and remove ones showing acceptable germination. Keeping seedlings for too long in the high humidity environment can cause “damping off” to set in and kill the seedlings.
As pots with germinated seedlings are removed from the humid atmosphere, they are moved to a shady area of the greenhouse with good ventilation (I use a fan). Depending on the species they can remain green as in Figure 15 or quickly develop a healthy red tint. In some experiments I have seen that too much light can hamper development and sections of pots that received more filtered light sports larger seedlings on average. Other growers move the pots from the humid environment as soon as they germinate and directly into full light similar to that of adult plants – with excellent results.

Watering seedlings
The soil mix should not be allowed to dry out completely but soil should also not be soaking wet all the time. Too wet conditions can cause rot as shown in Figure 16 where the entire half of the pot was already lost. Seedlings start to turn bright green and almost disappear within 24 hours. The disease can spread very quickly and wipe out an entire pot. Prevention is better than cure but if you are face with this situation you can try and quarantine affected pots (i.e remove from tray that contain other pots to limit chance of it spreading to other pots), withhold water, and increase ventilation. Before starting the dry treatment, I dose the pot with a 6% hydrogen peroxide solution. Foaming of the solution is usually an indication that you have hit something.
A common watering mistake is to water too lightly during the first couple of weeks and even months, assuming that the soil is wet. The reason for this is that soil surface often develops a dark coloration during germination, maybe as a result of algae staring to grow, and that creates the illusion that the soil is wet, where in fact it can be bone dry. I leave a toothpick or skewer in some of the pots and one can easily judging the moisture content of the pots when pulling it out.
Soil that have have become too dry (especially if it contains copious amounts of fine organic matter) can be difficult to wet. Sometimes water will puddle on top and eventually drain along the sides without reaching the roots. When this becomes evident, I prefer soaking the pots in water so that air is displaced by the rising water level. Be careful to execute this maneuver during rainy or cold weather as prolonged wet conditions can cause rot. For this purpose I later move batches of pots back to trays without water. If it becomes necessary to soak the pots, I simply add some water to the trays. Make sure you remove excess water after a couple of hours.
In my opinion deep watering, followed by periods of drought helps to develop a strong tap root. Shallow watering tends to cause a fibrous root system close to the surface. Too frequent watering can stun plant growth. Sometime when transplanting seedling a see a nice developed piece of taproot, ending in some bushy root growth. I suspect this might be the cause of root rot terminating root tip followed by subsequent rooting again – something that would require energy that could have be channeled to vegetative growth.
After care
As seedlings mature watering can be reduced to once a week or so (depending on conditions) and allow soil to dry out for couple of days before watering again. After about 4-6 months, the plants will probably start to renew their leafs. During this time, seedlings will start to look shriveled. When this happens allow longer dry periods to encourage the plants to absorb the old leafs.
Something to look out for is sudden greening of the seedlings. This a sign of some kind of soft rot caused by bacteria. It is typically connected to too wet conditions in the pot for too long. Affected plants loose their coloration, turns green within 24hrs and disintegrate to a watery pulp. Again, move pots to good ventilated area, withhold water and apply 6% Hydrogen peroxide solution . If the situation persists and plants continue to die, it may be best to remove seedlings from soil, rinse them in the same hydrogen peroxide solution and leave them bare root in indirect light for a couple of days. The affected ones will quickly dry up and the healthy ones will remain plump. I have performed this on a pot of 5 -6 months old seedlings and managed to rescue 36 plants.
Some seedlings may still be sensitive to too strong light for several months. We watchful for changes in pigmentation while the bodies remain plump. Too strong light can bleach out the chlorophyll in plants. (I actually expect that is more a temperature issue than a light issue) Since they cannot photosynthesize any more, they will eventually die when they have used up all their resources. Offer some more shade should this happen.
Transplanting
In a future post we will look at transplanting seedlings. For now, leave them alone for at least the first year. Transplanting too soon will stun the seedlings.
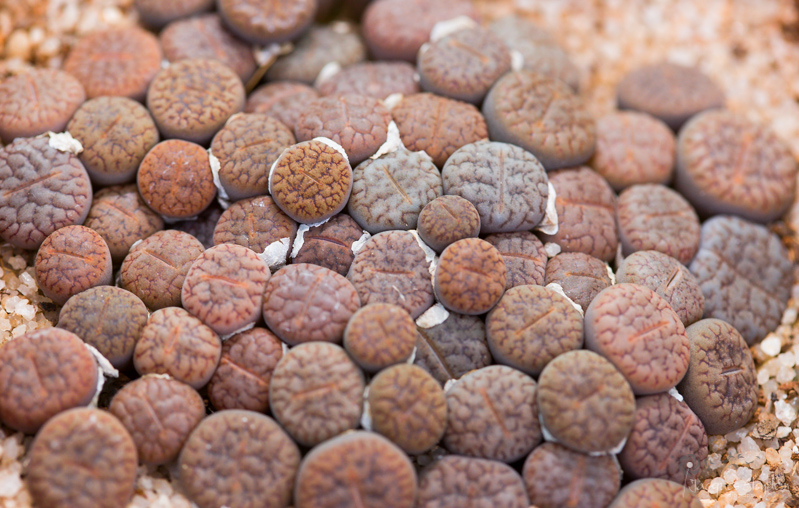
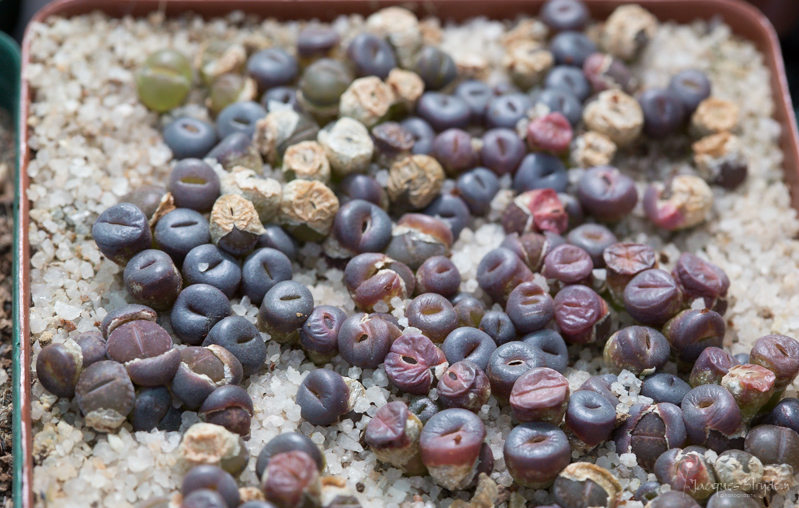
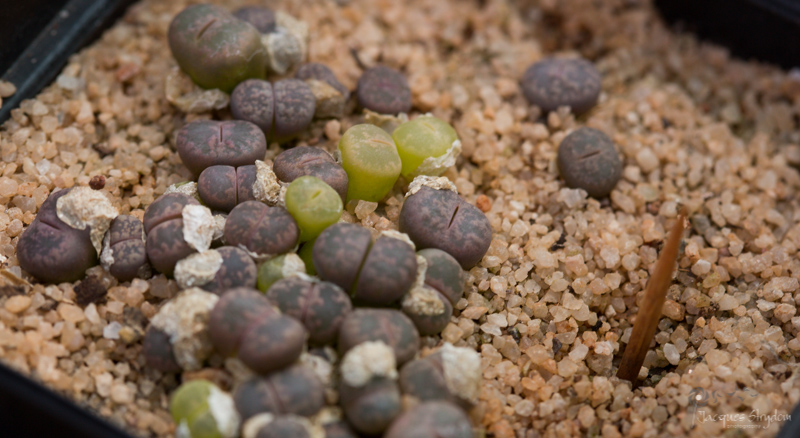
Below are some more pictures of Lithops in the making. Click to enlarge. Happy sowing!


Excellent info here.Just started with Lithops ,sowing from seed.
Thanks for sharing you experiences in growing this wonderful plant.
LikeLike
Thanks so much Roger
LikeLike
Thanks for the tips and tricks. I enjoyed reading your blog
LikeLike
Thanks for the feedback Henri
LikeLike
Very interesting reading! Thank you!
LikeLiked by 1 person
Fantastic information! Thank you so much!
LikeLike
Dankie Marieke!
LikeLike
Really nice photos. Thanks for sharing
LikeLike
Very nice explanation on how you are growing your Lithops. Congratulations for a great job!
LikeLike
Thats very informative. Thanks.
LikeLike
Great post! Must be the work of an engineer…
LikeLike
well done -thanks
LikeLike
Good morning, Jacques. Just so you know, Funginex is no longer available in the US. I did some research this morning and Ortho’s Rose Pride (6.5% Triforene) no longer includes Triforene. The new recipe has proven useless for those treating roses. Because of this, I’m afraid to test on Lithop seedlings.
If you find success with an alternate product, please let us know. Trying to minimize the green stuff while growing seedlings.
LikeLike
Hi John. Thanks for the feedback. The green stuff are alge and harmless to seedlings except for making crust that can hamper watering. Microwaving substrate first helps to kill algea spores. See if you can find benomyl for systemic fungal protection.
LikeLike
Hi Jacques,
Your blog is so inspiring! I can’t wait to order some lithop seeds and start growing 🙂
I was just wondering what program you use for the QR code on the label? Is it a phone app?
Thank you 🙂
Lena
LikeLike
Hi Lena, I am glad you liked it. I use free QR code reader downloaded from Android store.
LikeLiked by 1 person
Jacques, what a fabulous blog. Many many thanks for sharing your expertise. I was trying to get the swimming poll filter sand and seems quite expensive. What will be your second best option to replace it?
LikeLike
Hi Juan, thanks for the kind feedback. You can try aquarium sand. Or chicken grit. At the moment I use a commercial germination mix that is pretty much 100% organic. It can be problematic in certian climates.
LikeLike
Thank you, Do u know good seeds seller? I want some lithops seeds.
LikeLike
Have a look at my recommendations under Sources of Lithops seed.
LikeLike
I bought seeds off Amazon and they supplied a plastic portable condiment container with a lid and cotton. I sewed my little seeds in it and now they have sprouted. But they gave no instructions on what to do next. I have no clue how or when to transplant them. Any help?
LikeLike
Not sure how to proceed with that methods? May plant with the cotton?
LikeLike
I was wondering how organic fungicides would work with Lithops. Some used are Organic milk, baking soda, coffee, vinegar (all mixed with water and in varying proportions) and other various cheap and easily obtainable ingredients.
LikeLike
Compliments. Very interesting reading! Thank you!
LikeLike
Excellent guide – I laughed when I read about sinkholes from the drainage holes because that’s *exactly what happened to me*. I’m about to do a round of sowing and I bought some cheesecloth to line the bottom of the pots.
You mention bleaching and show a photo of some green lithops, but those look healthy to me and like a normal variation….
LikeLike
A quick question, can i seal the bag after i germinate the seeds as i want to keep lithops seedlings moist for 2 months or so?
If not adviseable, how can i keep the seedlings moist for 8 days without watering? I will be going for a business trip and this is nerve wrecking. I live alone, so i cannot ask anyone to help on this. Can i just leave the bottom soak with water then?
LikeLike
Hi, how old would the seelings be by the time you leave? After a month they should survive watering interval of a week. I had stuff sealed in a bag for 2 months but it is risky.
LikeLike
Hi, thank you for replying. They will be more than 1 mth, around 1.5mths old by the time i leave.
Another question, i have purchased a 24W LED grow light (red n blue). I am wondering if it is enough for seedlings? Or do i need more? Stated as 1500lm but when i tried measuring using lux meter on iphone app, it only measured as half of stated. Is it better for me to get a proper lux meter or better LED? Suggestion?
LikeLike
Hi, remember one lux equals one lumen per square meter. So if you vary distance from source, lux readings will differ. Not sure how accurate phone readings are.
LikeLike
This is the most complete and informative germination guide I’ve seen yet. Glad I found this. Thank you for spending so much time creating this document.
LikeLike
Thank you so much for putting this information out there! I am just starting a new project trying to grow lithops from seeds. The tricky part is that I live in Boston, MA, USA, so I have built my own LED lights and doing it entirely indoors. Here is a link to the webpage where I am documenting the progress.
https://www.joshdoesathing.com/growing-lithops-from-seed
LikeLike
Hi Jacques!
I’ve started some of your seeds yesterday. I hope everything will go well! Thanks again! I am so excited 🙂
LikeLike
Hi Jacques… Fantastiese inligtingstuk..Ék is gelee in Namibie en het n paar vrae rondom mistof en fungusweermiddels Wat as alternatief gebruik kan word Wat plaaslik beskikbaar is
1. Kan ek multifeed se 19:8:16 gebruik tydens die aanvanklike Saad planting?
2. Ék Het redelik moeilikheid om funginex op te spoor kan enige van die volgende gebruik word vir fungus- en bakteria weermiddel VERIKOP VAN EFEKTO
OF LAWN FUNGISIDE ook van Efekto
Of ROSECARE 3 van Efekto…
Baie dankie
LikeLike
Hello Jacques,
I have a question about using hydrogen peroxide to disinfect the seedlings/plants.
I live in the US and the hydrogen peroxide solution that is available here is 3% for first aid purposes.
When you say 6% hydrogen peroxide, do you mean you mix your own solution (6 parts first aid hydrogen peroxide:94 parts water) or is there a 6% hydrogen peroxide available in South Africa?
Thanks!
Joyce
LikeLike
Hi, there are many grades of hydrogen peroxide available in SA. Depending on what I could find the day I would mix it down to get to 6% equivalent. If you only could find 3%, try using it straight.
LikeLike
Hello, I would like to say thanks for this post, I’ve got a big collection of seed waiting to seeding but my concern is to kill them. I live in northern of Uk, It’s cloudy all the time with high humidity, the fungus is a problem here. I couldn’t get the fungicide you recommend. I wonder if Fungus Fighter Concentrate ( bayer garden ) 125ml is a good idea. Contains benzisothiazolone and Contains a mixture of 5-Chlor-2-methyl-2H-isothiazol-3-on und 2-Methyl-2H-isothiazol-3-on (3:1) (CIT/MIT). I would like to prepare around 200 seeding pot of different species. Any tip for seeding these amounts of pots? Thanks for you great job in this blog I enjoyed reading it.
LikeLike
I have found seedlings to be very resistant to fungus and bacteria. Give them 20-25C temperatures and they should germinated into strong seedlings fairly quickly. Step up ventilation as soon as possbile and give good filtered light. For seeding large amounts of pots I do it in batched of 50 or so, depending on how many trays I have at hand. Divide seed into batched of 50 or so and start numbering pots or add details. Fill with substrate, seed, move to tray. Once tray is full add water and cover up.
LikeLike
Thank you for the useful information. Do you sell seeds?
LikeLike
Hi Jacques,
This article explains the whole process very well – congratulations!
I’ve followed all the steps, and sourced materials, pots, seeds, and containers, even a bottle of Funginex. The only minor uncertainty is finding a water soluble fertilizer giving understandable dilution ratios.
Another non obvious issue is sowing the seed without forming clumps – once they’re on the substrate there’s no way of spreading them out further. Any hints or tips on ways of doing this?
Given all that, I have 19 out of 20 germinated sets of seedlings in 10cm pots after about 6 to 7 days. The seedlings are minute when they first show, but grow bigger daily. The question is what happens next, and how soon. Presumably the next step is to move the germinated pots out of their covered “water bath” into the open, but still in a tray that can be bottom watered. How quickly/soon should this be done? The seeds germinated maybe three or four days ago, and it looks like a pretty high germination rate. It looks like the hold out pot is just slow, and I’m expecting it to show signs of life in the next week or so.
Thanks for any clarification!
I’ve started my second batch of 20 pots with seeds ordered from you.
Regards
LikeLiked by 1 person
Hi Jacot,
Keep in mind that the seed are freshly harvested and may germinate erratically. You can skip fertiliser for now and add to water in a couple of weeks time. For sowing, I tilt the packets and tap lightly as I move the packet over the substrates. If you really want you can mix it with fine sand and then sow the sand… As soons as pots have germinated you can move them out of the water bath to a light (not direct light) and cool spot. You will notice if they get too leggy then you can move to brighter spot. Bottom watering is useful if a crust have formed on the top.
LikeLike
Wow, this was so in depth and helpful. Thank you sooo much! x
LikeLike
Thanks Whitney! Are you sowing some?
LikeLike
Jacques,
I’m getting enough small pots planted out that my koki on a sucker stick labels are getting a bit tired!
Thinking ahead to transplanted seedlings etc, I can see this becoming a problem. Can you give a bit more info about the label stock you use for laser printing your labels? Are they available from Takealot or similar? Clearly something waterproof and that will stick on the plastic pots securely…
Any info and advice welcome.
Thanks
LikeLike
Hi Jacot. I use a Brother PTouch700 for waterproof labels. When sowing large quantities I would assign number to the items in Excel, keep it safe and only write the number on the pot with a 6B pencil. E.g. this years sowings was allocated numbers 19-001 tot 19-185. Store the master sheet on cloud, local pc and hardcopy
LikeLike
Hi Jacques, I have begun raising Lithops (mixed) seeds here in Tasmania, Australia from late December. I have many now that have sprouted and nice green colour. I have kept them humid but not overwatered. Spray mist many times. My question, is now that it has been almost 2 months, when should I let them dry out more or should I continue to keep them in a humid environment. We are in late summer here. Growing them inside, with indirect sunshine most of the time. Any suggestions would be welcome.
Thanks. Jim
LikeLike
Great information, I wish I had found this before I started mine. Germination has been good but I think I have kept them to wet and a few of them have turned to mush. But so far most of them look ok.
LikeLike
Great info !
I just tried my first Lithops seeds in less than ideal conditions (living at a tropical location with temperatures not lower than 24/25 C at night and up to 40 C or even more during the day.
Nevertheless, germination was surprisingly fast. First seedlings came out after only 4 days. Right now it’s day 6.
Now the challenge will be to keep them alive.
LikeLike
Wouldn’t fine sand be bad for the seedlings? Fine sand has grain size of around 1/205″. I see most people use course and very course sand,
LikeLiked by 1 person